Wednesday, 17 June 2015

Six things I really love about my local yarn shop


I am lucky enough to live in a little market town in Devon that has a thriving craft scene (is the word 'scene' appropriate for craft? I was thinking like music but it sounds odd somehow, like people are wandering about rapping over their knitting.) We have quite a few fab shops for patchworking, sewing, knitting/crochet, furniture upcycling (the list goes on!) as well as a covered market where local people sell their own crafty bit and bobs. It has been my plan ever since I moved down and found this oasis of handmadeness to join in and start selling some of my makes. It could have potentially been anticipated that working lots of overtime and doing up a very eighties house would have slowed those plans somewhat, and I've not actually managed to get my finger out and do it yet, but soon I will! I think the main problem is perhaps that I'm just  bit greedy and want everything I make... So eight months ago a little yarn shop opened right near to my house called Yarns of Tavistock (it's on my way home, and when I saw it for the first time I nearly hyperventilated. NEW WOOL SHOP!!!!) I went straight inside to have a mosey as it was the opening day and would be rude not to! Also, they had free biscuits. Now it's part of my route into town to go and have a little drool through the window. So I thought it would be nice to share what I love about it - but also about local yarn shops in general. I don't want to sound like an annoying right-on guardian reader (which I may or may not be) but living somewhere which has so many independent shops has been a total revelation. It's great. I mean the people here ran McDonalds out of town. That shows some serious willpower as well as loyalty to the independent shop cause.

So to business:

Brilliant Things About Independent Yarn Shops

1. Lush local yarns


It may surprise you how many wool producers there are local to you. I know living on the doorstep of sheep-farming Dartmoor probably helps the local wool supply somewhat, but even when I lived in Southampton (somewhat less of a rural idyll) the local yarn-eries still had a couple of lovely local yarns. There is something wonderful about giving a yarny present to someone and being able to tell them 'oh yes, I made it myself. Out of local wool'. You feel like something out of a Thomas Hardy novel. And just look how pretty it is! This one is by Tavistock Tastes and Textures (their folksy shop is here) They do hand dyed locally spun Jacob's wool. My mother-in-law made about 3 hats out of 2 of these balls and oh my gosh they are so warm and soft. And the lady who makes all the wool is lovely.

2. They have courses and workshops (where real people actually teach you things!)


Fleece ready for the spinning workshop. Just look at that colour! I want to put my face in it.

Because some Unnamed Internet Companies who it may be suspected perhaps Do Not Pay As Much Tax As They Strictly Should also have fewer overheads due to not having to run an actual shop, internet prices tend to be a bit cheaper. Which means that shops have had to cut their margins somewhat and are selling less wool into the bargain. Double bad news. However, the silver lining is that most local yarn shops have diversified and  now run workshops. Yay for workshops! Learning new crafts, taking home something you've made yourself, meeting like minded people, making cool stuff. Such a good idea. And no trawling Youtube for videos to try and make sense of weird stitches! Yarns of Tavistock do absolutely loads of stuff - drop spinning, spinning wheel spinning, wet felting, needle felting, sock knitting, crochet squares/flowers/cardigans, beginner's crochet, soft toy making, paper making silk fusion.. and that's just June. I feel exhausted just thinking about it. But in a good way.

3. Local crafters sell their makes there


Just seen Jeremy Clarkson naked.

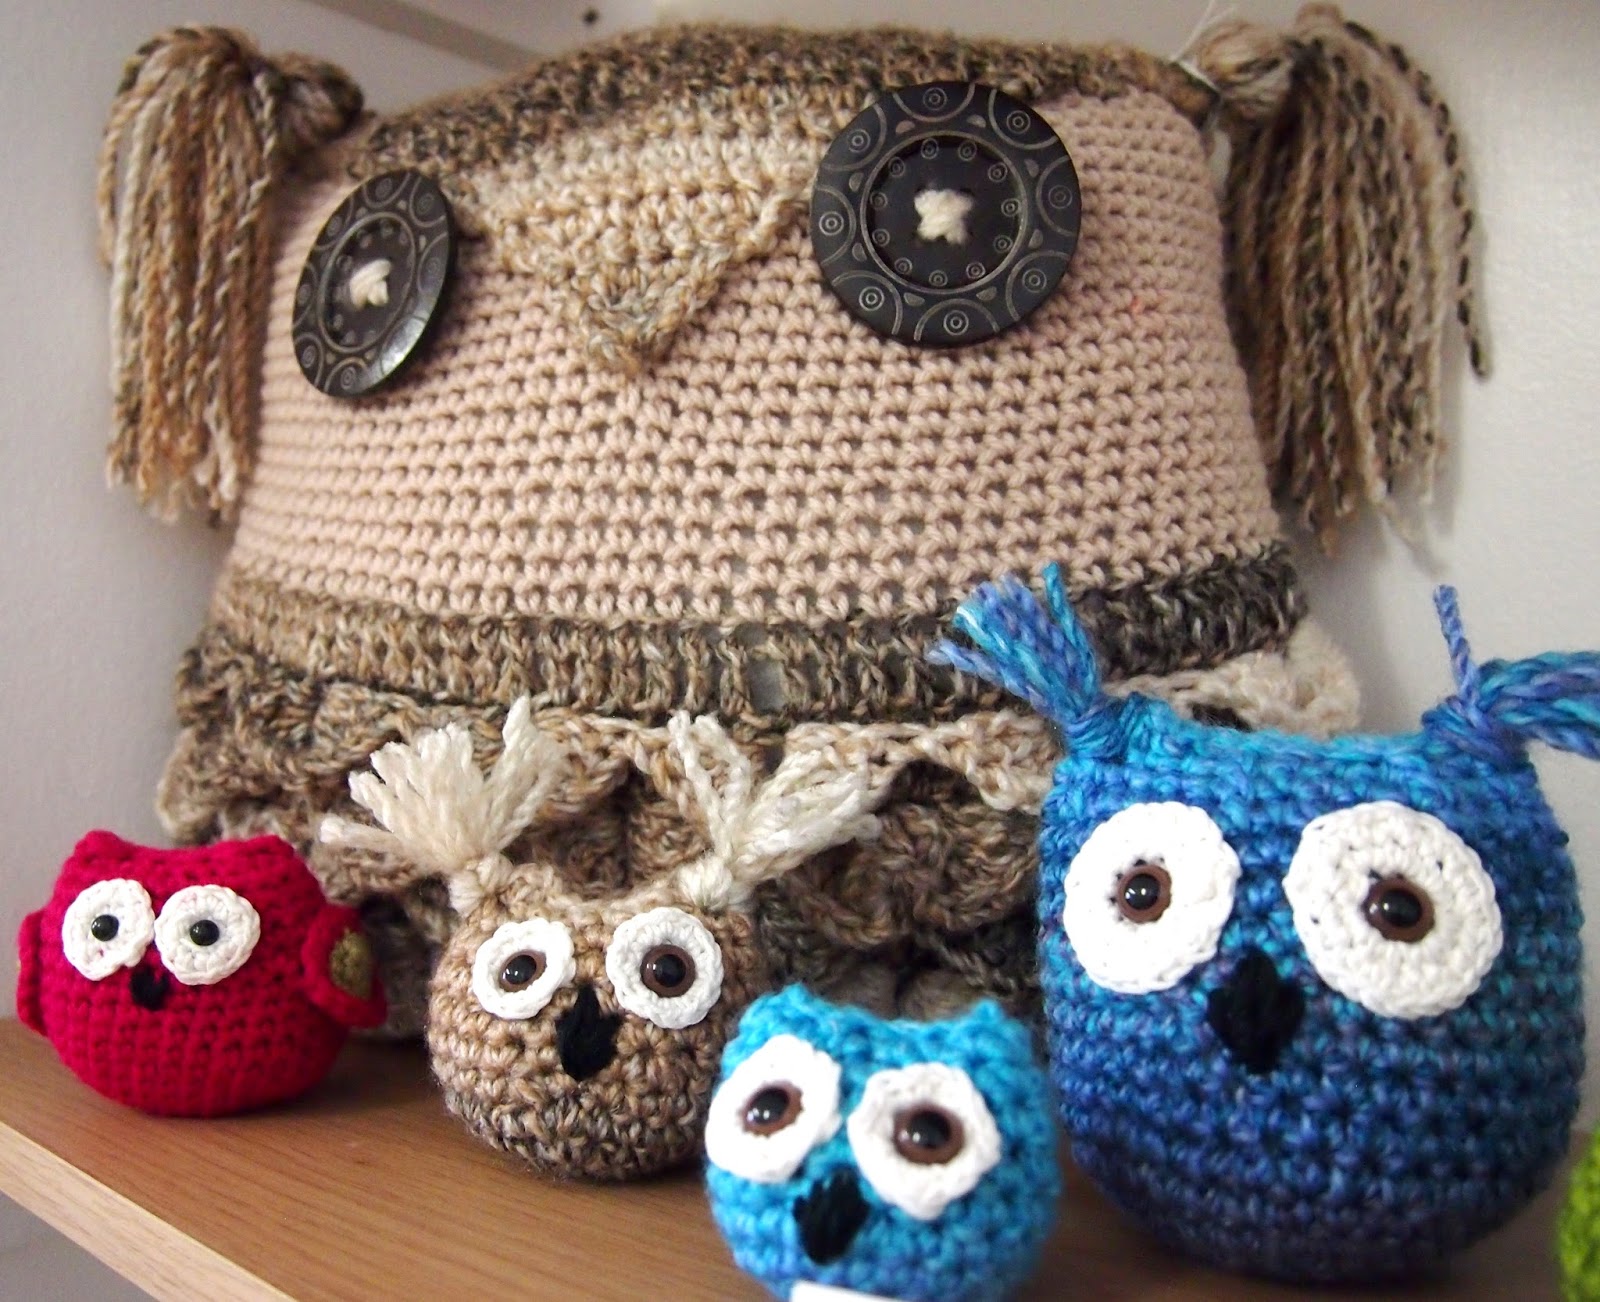
My local shop has a big old wall of shelves where local crafters can display their makes to sell. Sue (the lady who owns the shop) changes them every month so it's nice to go and have a little mosey and see what's new - brilliant for birthday presents and a bit of inspiration, and so lovely seeing talented people have a space to display and sell their bits. Nice being able to support two local crafters at once too. One day I will sell something there!


cuuuuuuuuuuuuuuuuuute!


Toadstool are so underrated! I could make a ladybird to sit on them. Or a fairy!

4. You can actually touch and feel and sqidge the yarn before you buy it. And it's presented in baskets.


YARN IN BASKETS!! Best. Thing. Ever.

There is something about wool in baskets. It is just the perfect centre of the yarn/basketry Venn diagram. It makes me want to put on a long skirt and carry the yarn through buttercup sprinkled fields to market. Sigh. Perhaps that's just me, but you have to admit it is super pretty. I have a basket in my living room for just this purpose, like yarn Feng Shui. I really do think that being able to see wool in real life is so much better than on a screen. It just looks and feels different so much of the time. Also, if you're lucky there might be examples of the yarn knitted/crocheted up so you can see it as it would be in your project. I have a really hard time imagining what wool will look like made up, especially if it's variegated, so I find this really useful.

5. If you buy wool there you're supporting someone who really loves craft to sell you craft things.


(Another picture of yarn in a basket just because)

No faceless warehouses. No websites trying to get you to click through to buy stuff you don't need. No sitting looking at a screen for ages. No postage charges. Instead, have a good old natter with the owner, get some advice on the best yarn for your project and some tips on that bit of the pattern you're stuck on. My local yarn shop lady Sue is amazing. She's only been crocheting/knitting for a year or so and she is AMAZING. Like, professional standard. She's already adapting knitting patterns to crochet, making socks, running workshops. I've been crocheting 8 years longer than her and she is SO GOOD. She teaches me something every time I see her. I bow down to her greatness. Where I dip my toe into a bit of blogging, and consider trying to sell a couple of bits but never really get round to doing it she just jumps into running a crafty shop with a cheery get-on-with-it attitude. I take my hat off to her.

6. The local knit-and-natter or yak-and-yarn happens there. And there's tea!


Socializing with crafty people is just the best. And it's a designated time for you to do your craft. And you can pick up bits you need while you do it. And there's tea. Getting into the whole crafting community. What's not to like? Yarns of Tavistock have theirs as a drop-in type arrangement over two and a half hours which is great when you have a baby who is generally whingey/sleeping/breastfeeding/vomiting whenever you're trying to leave the house to do anything. She can't stop me for that long! mwahahahaha!

I think when talking about crochet or knitting or yarn crafts in general we're all good at chatting about lovely yarns, or great patterns or inspiration but shy away from talking about where we get our yarn. I'm not sure why, because I love going to get yarn and I see a lot of other crafters who also obviously enjoy the whole finding-yarn process. Well, I'm coming out and proud and saying: if you try to buy local food or fairtrade clothes or support local causes, go and support your local independent yarn shop. So in conclusion I love my local yarn shop and so should you! They really are brilliant little places and deserve as much support as you can give them.


I want all of them please.


Sunday, 14 June 2015

Summery mulled wine (and embarrassing cake)


Hello there happy campers!

I had a mini epiphany a couple of nights ago. We were drinking a (donated!) bottle of very nice red wine which was really very lovely, especially being the first red wine I've had since before getting knocked up (I'm an extremely cheap date now). However, it was slightly... how could you explain it... hits the back of the throat somewhat?.. rather astringent?.. Drier than a fifty year old prune tumbled dried and left to watch an Open University documentary on physics? In essence, it tasted like fresh sloes ie. very dry indeed. But the funny thing is that it was genuinely a very nice wine despite making you do funny faces when you drank any. You could tell it was a super lovely wine just trying to get out. So after a little animated discussion with husband (I am a very cheap date) where we agreed that it was like a sloe gin in wine form, we decided this wine would be amazing mulled. After all, it's June! We hadn't had mulled wine in AGES! We MISSED mulled wine.We NEEDED mulled wine. So we made mulled wine! Yaaay!


You can tell it's good wine: just look at that cork. It's an actual cork. With writing on it. Fancy.


And you know what? It was amazing! Even the next day rewarmed and a bit more sober (soberer?) it was so nice. I think it's the great untapped summer drink, for those cooler summer evenings where you need a jumper but you have bare legs and still feel a bit chilly. It's all warm and spicy and orangey and yummy. I think that you could have quite a lot of fun trying different summery flavours for mulled wine - like a grown up punch (generally punch just reminds me of uni parties and drinking neat gin which had been shown some orange juice. Blerugh. But mulled wine punch? This I can get on board with!) The mulled wine we made was fairly traditional: it had orange, lemon, spices and a cheeky slurp of homemade sloe gin, but imagine a really dry red with a little spiced rum, perhaps some pineapple or grapefruit juice... it's basically warm sangria!


All those lovely spices. I'm a big fan of spices. I put practically half a jar of spice in a single apple crumble. My other half is very spice-conservative though, he's all about subtle hints whereas I prefer the smash-on-the-head-with-a-mallet approach to flavours. Well, everything really. When I was young, about ten or so, I was making this big old fruit cake and asked my sister whether I should put mixed herbs or mixed spices in it. She said herbs (naturally! who wouldn't given an opportunity like that?!), so I duly put herbs in then accidentally grilled it (didn't really get how the oven worked). Strangely, it was actually quite nice as I'd used that weird baking spread stuff which melted out of the mixture then sort of fried it, so it ended up tasting a bit like savory pancakes. Embarrassingly, I made the same mistake with a layered lemon drizzle cake the other day that I accidentally grilled (new baby, new oven, I'm taking no responsibility) I realized about halfway through the cooking time, so I flipped it over to finish cooking (it was raw on the bottom) and quite literally drowned it in butter icing, because nothing tastes bad when it's covered in butter and sugar. Well, people ate it and no-one got food poisoning so I'm counting that as success! Yay!


Cake or death?!


So we come to the important bit: how to make the mulled wine of your dreams?


Tall billy can, open flame, lots of wine: what could possibly go wrong?

Here is our recipe: I would encourage you to make your own swapping bits out and having a little experiment. If you do, report back and I'll see if I can combine results to make the Best Summer Mulled Wine Ever Made Ever. It's a tough job, but you know, I'll make that sacrifice.

Ingredients:

One bottle of dry red wine
An orange
A lemon
Two star anise
Six (or so) cloves
A cinnamon stick
Pinch allspice, dried ginger and nutmeg
A good slug of sloe gin 

You could go all out and get some mulled wine spice bags if you're feeling keen, or substitute the spices with others if you don't have any. Think of this as a the chuck everything in casserole kind of recipe rather than an accurate baking type affair. Best kind of recipies in my opinion. 

Anyway, back to the recipe. Cut the lemon into quarters and push the cloves into the skin. Slice the orange into thickish slices. Now pour the wine into a big saucepan (billycan not necessary, not quite sure what that was all about tbh) and add all the ingredients together. Put onto a low heat and warm slowly, making sure it doesn't boil otherwise you'll burn off all the alcohol (although if you were trying to cut down on alcohol, making mulled wine with 10 minutes of rolling boil would make a treaty drink without the bad bits! Genius!) Once it's all nicely warmed through, strain out the orange, cinnamon stick et cetera and you're all ready to go outside in the last of the sunlight with your nice warm mulled wine and some olives and chat about holidays. Sigh.


Thank you wine.

Friday, 12 June 2015

Pretty colours from outside that I want to make into happy yarny projects

Spring really has most definitely sprung down here in Devon, and the lovely weather is really threatening summer. The bees, dragonflies, sparrows and tourists are all buzzing and frolicking in the sunshine giving happy, busy action to a stage made up of thousands of freshly budding trees and flowers. The colours cheerfully wafting about have been really quite something, and as I have been pootling about my business walking the dog, or taking the baby to see her little baby friends I've been taking a few pictures thinking 'one day I'll make a lovely blanket in those colours...'. I thought you might like to see some of them... 


Purple rhododendrons and an oak tree - I love the idea of using lots of lovely shades of green from dark moss to that nearly-yellow green where the sunlight hits the leaves with a bold contrasting purple. Perhaps in a granny blanket with a flowery motif...mmmmm....


The trunk of a paperbark cherry tree. I love that deep lustrous red with the slashes of grey-silver-orange. Don't you think this would make fab legwarmers?


The mossy embankment of an old railway cutting now used as a footpath. If you look closely you can see water dripping from the moss. I love the earthy, rocky tones where the moss has come away and the bright highlights of the long grass in the foreground...


My husband's kilt at a family wedding. A rather summery colour combination isn't it? As you may have noticed, I love bright colour but I definitely wouldn't have put red, orange, blue and yellow with black and white, but it really works! Those ancient Scots knew a thing or two. I think I might make baby girl a little blanket with the Ogilvie colours :)


This was super embarrassing when I took it - I was happily snapping away then realised the owner of the house was watching me taking pictures of her garden wall. Nooooooo! She was very lovely about it though. I wouldn't have thought to put pale mint green with a pastel orange but it looks rather nice with the light purple-grey of the stone and the grass green leafy highlights. Thinking I may have to rethink my aversion to pastels - the trick seems to be to pop in bright highlights..


That said, you can't beat out and proud brights sometimes. :) 


Another subtle colour combination on a spruce pine - again, a cheeky flash of brick red lifts those lovely muted mushroom and pale reddy brown tones.


Red and purple grass seeds. It was windy when I took this and they were blowing about looking green one minute, purple the next, yellow the next.


Now I generally really hate peachy pink. But look at this! I think the gentle waves of the petals make it look lovely. Perhaps you could get the same effect with a properly soft mercinised cotton that drapes really well?


And finally this Japanese maple in my garden. I think this is just the perfect palate of red, yellows and oranges from the deepest almost burnt-brown to flame yellow. I think it would make a great cosy fireside throw or chunky oversized wraparound cardigan.

What inspires you at this time of year?

Happy weekend everyone!
xx


Tuesday, 9 June 2015

The battle of the curtain ties

Just before we start can I share something very exciting?


MY POTATOES HAVE MADE LEAVES!!

Yaaaaaaaaaaay!

Ok, now I have that out of my system, back to the business of the day: curtain ties! If you remember, last time I had made two different types of curtain tie and was going to test them out to see what they looked like in real life use. We had the long, complicated pretty version I had dreamed up, and the short, simple practical one that was my husband's idea.  I finished off both with prettifying touches:  the shorter one got a red and pink rolled rose with a padded edge:


And the longer one got two daisies and a ladybird. I made a ladybird for a crocheted necklace a little while ago and now I'm a bit addicted - everything seems to look better with a ladybird.


Ladybird! Eeeeee!

So are you ready for the big reveal? Here we go!

First we have the short and sweet rose and loop curtain tie:


Now, this one went up first and I thought 'you know what, that's a good length, the rose contrasts nicely with the green and yellow of the curtains and it's not too fussy, easy to swipe round the curtain with one hand while you have the baby in the other. Damn it, my husband was right' (on second thoughts direct translation of thoughts onto page seems like a risky business)

Then I put the other tie in place aaannnndddd:


Not too shabby eh? I have to be honest, I know it's not so practical and streamlined and better in every way generally like the other one, but I think I prefer this one. Being honest, I've never really ever been a practical, streamlined kind of girl. And this one has a ladybird on it! Aren't the curtains lovely? My favourite (and only, mwhahaha!) sister made them for my baby girl a couple of months ago (pre-birth), but due to having a seriously epic amount of work to do on the house/nursery and the baby coming a very inconvenient 3 weeks early they have only just gone up. Which is a shame because they are glorious.

Anyhoo, what do you think of the ties? I'd love any opinions/advice/curtain tie experience you may have!


I did become quite enamoured with the rolled rose. I used the pattern from Crochet Bouquet by Suzann Thompson.  It is the most dog eared, used crochet book anyone has ever had. I bought it about a hundred years ago when I was just learning to crochet, when I had the bright idea that I would work through each flower and thereby learn how to do all of the crochet skills in the world. In general it was actually not such a bad plan as I did learn a lot quickly, but it was perhaps slightly optimistic - some of the intermediate level flowers became evil nemesis flowers of doom as I just couldn't work out what I was meant to be doing. The rolled rose was one of these, and I hadn't tried to make it for years as I just remembered it as being all a bit difficult, but I'm so glad I remade it! It's not that difficult really, it just helps when you've made a few things from a pattern. It starts life as a rainbow shape, then you go around the outside edge with padding, stretch out the padded edge, roll the whole thing up then sew it together into the leaves at the bottom. Easy peasy lemon squeezy!


I quite like the teardrop shape, I think it works quite well for the purpose of being a curtain tie :)

Don't get me wrong I do quite like this one. I say it's practical and streamlined but it's all relative isn't it? I mean, a starkly minimalist house is not going to have curtains, let alone a curtain tie with a rose on it.  Let's keep this in perspective people.


Note to self: this does not look like the Tate Modern.

I think the main issue with the long one is the combination of many, many leaves peppered along the length of the tie and the need to tie it for it to actually perform as a curtain tie. I made it long enough so that it could  be tied into a bow, but it looked a bit fussy...


But when I did a simple half hitch it was all a bit long and swingy:


See? It looks a bit straggly. But then I had a genius idea: how about combining the better design of the short one with the daisies/nicer wool/ladybirds of the second?!?!  GENIUS!! So I did a bit of squidgelling about to see what it could look like and I came up with this....


I think we could have a winner! Pretty and functional and quicker to make and IT HAS A LADYBIRD!!

I'm now getting stuck into making the hybrid curtain tie. The Romeo and Juliet curtain tie if you will. This whole venture is turning out to be quite a bit of fun! I think husband might be regretting asking me now though (he was going to do a simple loop out of parachute cord!)

Enjoy the fine weather everyone! I'll be back soon to show you the final results and also show you the questionable grilled lemon drizzle cake I made earlier this morning. No, it's not meant to be grilled.

Byeee!


Friday, 5 June 2015

Curtain ties and colourful twine


Hello! I thought you might like to see the beginnings of my attempt to make curtain ties for the small person's nursery.  Husband very kindly painted the top half of the nursery a very pale blue, then painted a pale green on the bottom half with a wavy line between the two, so it looks like green hills on a blue sky. Sounds a bit headache inducing, but it looks rather sweet. Anyway, he's just put up some green spotty curtains with yellow ric-rac my lovely sister made for baby a little while ago and he's asked me to do some curtain ties so that the nursery is Officially Finished (he is something of a mono-tasker in the same way that Caitlin Moran is something of a feminist).

I had a bit of a think and came up with the idea of doing a long tie that would be secured to the wall in the middle and tied in a bow around the curtain. To keep in with the outdoorsy theme I thought it would look rather nice to add some leaves, a couple of flowers and perhaps a little ladybird or two. I started by doing a nice long chain, turning the work and then doing a double crochet stitch in each chain. On this row I made intermittent leaves, sometimes by themselves and sometimes in pairs (to do this I made 9 chain stitches then working back towards the foundation row, I missed 3 chains then made a slip stitch, single crochet, half double crochet, double crochet, half double crochet and slip stitches.) Once completed I simply carried on doing double crochet stitches along the foundation chain.


I always overestimate how long I need to do lengths of chain stitches and end up with miles and miles of projects to complete- my Project of Doom actually started life as a scarf but was soooo loooong it seemed logical to turn it into a blanket (note to self: THIS IS NEVER THE LOGICAL STEP). So at this point I now had  just over a metre of fairly boring looking pale green cord with stunted little leaves.  Not really the whimsical vine-thing I had in mind, so to make it a bit more interesting I did a row of slip stitches in a darker green spiraling up and around the cord.  I think this gave it a bit of movement and made the right/wrong side of the work look less defined (I thought this might be a good idea seeing as this would be hanging and twirling around, and an obvious wrong side might look a bit stupid).  I filled out the leaves by crocheting along the foundation row with a mirror image of the original stitches.


I had soooo nearly finished when husband said nonchalantly 'why don't you just do a shorter cord with a loop on one end and a flower on the other?


<breathe>


WWWWAAAAAAAAAAAAAAAAAAAAAAAAAAAHHHHH!!!

THAT IS SUCH A GOOD IDDEEEAAAAAAAAAAA and I just did SO MUCH CROCHETING!! Noooooooo!!

So after having a teeny tiny mini meltdown about how it's unfair for him to even have ideas about yarny projects let alone good ones, especially without asking me (so unreasonable!!) I stopped being a nutcase and had a crack at this much more sensible Plan B. I made a loop out of 15 chain stitches and did enough double crochet stitches into the loop to make a firm ring. In a darker green I did a second row of single crochet around the ring, making the stitches by going around the post of the previous stitch to make an interesting texture.  Next, I added 45 chain stitches to make a much shorter cord (with a couple of leaves, I just can't seem to help myself) and a couple of leaves to stitch a large flower to at the end of the cord. A second row of slip stitches in a darker green make it a bit more interesting and finished off the leaves.


Yes, it did take approximately 79 less hours.


I've recently learnt post stitches and they're so useful! Check out the texture!


Which do you prefer? I did the first one in a cotton yarn which makes it look a bit prettier, whereas the second one is made in bog standard acrylic yarn and feels a lot more sturdy and sensible. I think I (secretly) prefer the first one but I have a sneaky feeling it'll be a lot less efficient at actually holding the curtains back. I tell you what: I'll finish off each one according to the original vision and see which looks and performs better when in-situ next to the curtains.There can be photos and voting! A curtain tie hunger games if you will. Although that does make you wonder how a curtain tie would kill another curtain tie. Strangulation? Sneakily pushing it's rival out of the window? I think I may have the premise for a new teen fiction trilogy.

Moving on from curtain tie hunger games (I think it's best for everybody) just look at this colourful garden twine!


Doesn't it look like it's straight out of the 1940s? I bought it a little while ago from a little hardware stall in the local market. There was yellow, orange, red, green, purple, pink and blue and I wanted ALL OF THEM. But that would be an awful lot of twine. So I got blue and pink (pregnant at the time, can you tell?!) They're going to be my next project - I'm thinking either a real string bag, or some crochet pots for the nursery. Definitely something practical.


I love how bright they are! Talking of bright....


I'm loving these fab gerberas! They're making my kitchen feel all cheerful. I love sunny flowers. We had sunflowers at our wedding, they just look happy. Well I have many curtain ties to finish and stage in an elaborate death fight so I best crack on! Also the baby has a cold and we have a minor snot-armaggedon situation going on here so have a lovely Friday night and speak soon!

Bye!
xx


Tuesday, 2 June 2015

Baby blanket


Good news!!!

The baby blanket is doonnnnneeee! hurrrrrah!!!

And as you may gather after reading this post I am a teeny bit proud of it. I love making something that you think actually, yup, I can now make something that grown ups with tasteful tastes might consider having in their houses. You might say that Nine Whole Years of crocheting should bring you to this point quite naturally, but I've always felt the stuff I make has that amateur je ne sais quoi, perhaps because I'm drawn to lots of bright colour and hippyish designs (my second big project was a free-form style waistcoat taken from a genuine 70s crochet book. It was epically mental. I was young and at uni and idealistic at the time). I mean I really love shabby chic but it doesn't come naturally to me because you have to use lots of neutrals which set off the bright bits, and as I tend to be buying wool on a bit of a budget, it always seems a bit of a waste to get a muted colour when you could get a lovely bright one! So I have made a concession to cream, but I am aware that my last few projects have been rather cream-and-colour granny square heavy. So henceforth, I am going to venture out into the exciting realms of -tasteful!- crocheted items that are not just Cream Granny Squares.  It's scary but let's think of it as an adventure!


I love folding finished blankets. So satisfying.


But back to business. This blanket was actually a nice little project, especially if you're quite new to crochet.  It is 49 squares of four colour rounds (each round a different colour) with a fifth cream round joined together using the join-as-you-go technique. I'm a new convert to this technique which is brilliant - it makes the final round and the joining together the same job and is simple as you like. You start off by doing a normal fifth round on the first square (three trebles and one chain-1 space around with chain-2 in the corners), then on the second one you start by doing a normal granny square round. Then in a corner, instead of doing 2 chains to make the turn, pop two cheeky single crochet stitches in the chain-2 space of the joining square, three trebles into the chain-1 space below like normal, then one single crochet in the chain-1 space above. Carry on until you reach a corner again, where another two single crochet stitches are needed, then stop joining and continue as normal. As many sides as you like can be joined this way, just keep doing single crochet stitches in the chain-1 spaces above and you're set! I like the finish you get with it - there are spaces that fit with the gappy granny square pattern rather than the solid lines produced with traditional crochet joining technique. I suppose it's a bit less secure though - a big heavy granny blanket might want the more stable solid seams, but for a little project like this one the technique is perfect.  And quicker! So yay!

Sooooo ready for the final reveal?

Reeeeaaaaadddyyyyy.....


ta daaaaaaaaaah!

A cheeky baby wave even made it into the frame! Baby was being exceptionally wriggly and chatty today. Very cute and extra challenging for birds eye photos :) Also, in the interests of honesty I did steal the 'ta daaaah' thing from Lucy's Attic24 blog (it's my fave blog in the world ever, hard not to steal from something you think is totally fab)... I was trying to find my own way to announce a finished project but 'ta dah' just seems appropriate - it fits the childish pride you get at making something pretty and wanting to show everyone.


So, you may remember ages ago I asked what colour pattern I should do. Well, I had a couple of suggestions via text which unanimously agreed that colour blocking was best. So I did indeed start by laying all the squares in the colour blocking pattern... and then I had to move it all and it all got a bit confused and then I ended up connecting a whole row on the wrong end and upside down. Then I had to do a reshuffle of the remainder so I didn't end up with a block of eight bluey squares with a random yellow in the middle. The upshot is that the blanket is a wavy diagonal colour blocky pattern of sorts. Ah well. Best laid plans and all that.


Mummy bed crochet and baby bed crochet! Naaww!

I have to confess that I did press-gang my daughter into modelling said blanket (she's a baby: it's a baby blanket, seems logical) and now I have literally NO IDEA how professional photographers ever get those stock knitting pattern pictures. It is quite literally impossible to get a sensible photo with a little person. Makes you understand why so many blankets end up artistically draped over sofas in ways that never happen in actual life (because actual life blanket usage makes for rubbish pictures, that's why). Evidence below: 


At least her face is in this one - she was a bit hungry and kept pulling the blanket over her face to eat it (rude!).  I have a lot of messy-blanket-in-a-moses-basket/settee pictures...


Where's the baby?! Eating the blanket from underneath, that's where! Of course.

So I tried to outsmart her by taking the picture from above, but she gave me that shame inducing 'what are you doing Mummy?' look. Then pushed the blanket off. Shame. Shame and failure.


Aha! Mummy 1: Baby 27.  Apparently the trick is to swaddle them! Does swaddling at five months count as unlawful imprisonment? Baby girl just seemed to find it hilarious...


Before deciding she'd had enough of humoring me and then breaking free and trying to grab the camera...


Look artful draping! So much easier...


Aaah, the edging. So I find that the edge of granny squares can often look a little unfinished. I tried doing a single round of double crochet, but it didn't seem to cut it.  Lovely husband then had the idea of doing a colour round with blues (blanket is for a boy after all) with another cream round. This looked nice but still Not Quite Right. Then I had a little mosey through my crochet books and hit upon the crab stitch as the finishing round. I hadn't done it before as any written explanation is totally incomprehensible (you crochet backwards! BACKWARDS! WHAAAAAAAAAAAAAAATTT!?!) but after a cheeky youtube search all became clear and it is now officially my most favourite stitch ever. It's actually very easy once you have the hang of it, and makes a pleasingly thick border with a lovely ridged texture. The crab stitch edge gives a really 'finished' feel and makes the post blanket completion ceremonial folding extra brilliant.


A section of edging - I think it worked out alright in the end.

So there you are! One finished baby blanket! Yaay! 

Following a request from husband I've been knocking up some curtain ties for the nursery this evening - I'll share my progress tomorrow. Annoyingly, halfway through my long complicated idea which was taking aaagggesss he came up with a much simpler, more practical idea that would still be pretty. Stupid engineers. Pah.

This blanket is going to my lovely friend who made baby girl this adorable bunny. She had her baby recently and I wanted to make her baby something woolly in return.  I love the idea of handmade gifts from family and friends telling the story of different times in your life, and I found it really touching she'd spent so much time making something for the beginning of my daughter's life. So this is some yarny love back in return :)


It's like the handicraft mafia!

Xx